Table of Contents
The thermostatic radiator valve (TRV) may seem difficult to change, but it is a task that many homeowners can do themselves. Whether you need to replace the entire TRV body or just the TRV head, the guide explains how to do it step by step, including combi tips and printing systems.
You will also learn how to change the radiator valve without drying the system and what to do if you just change the thermostatic radiator valve head. Let’s dive!
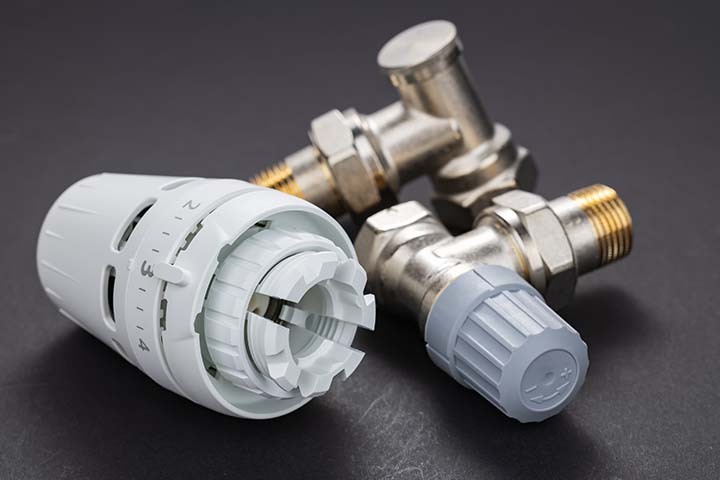
What is a TRV (Thermostatic Radiator Valve)?
A thermostatic radiator valve controls the temperature of a radiator. It feels the air temperature in the room and consequently adjusts the flow of hot water in the radiator. It helps to place each room at the desired rest level and improve energy efficiency.
TRVs are usually found in modern heating systems and are compatible with combi boilers and pressure systems.
Air Source Heat Pump Grants
When Should You Change a TRV Radiator Valve?
If you need to change the TRV radiator valve:
- The radiator remains cold even when the heating is on.
- The valve is leaking or stuck.
- The temperature control is not working.
- You’re upgrading to a more efficient model.
Tools and Materials You’ll Need
Before you start, make sure you have the following:
- Adjustable spanner or wrench
- Pipe grips or water pump pliers
- PTFE tape (plumber’s tape)
- Towels or a container for catching water
- Radiator bleed key
- Allen key (for some valve heads)
- Replacement TRV or thermostatic radiator valve head only
- Optional: Freezing kit (to avoid draining)
How to Change a TRV Radiator Valve? Step-by-Step Guide
Step 1: Turn Off Your Heating System
Before working on your radiator, turn off your central heating and let everything cool down completely. This prevents burns and avoids more pressure in the system.
If you have a combi boiler or pressure system, close the boiler and wait for the system to cool. You should also close the electrical supply to the boiler on a wall switch or fuse box.
Step 2: Isolate the Radiator
There are two valves on your radiator:
- TRV (thermostatic valve) on one side
- Lockshield valve on the other side
Make TRV a closed position (often marked as “0” or with an ice piece). Then remove the plastic hat and close the lock-free valve using a slide or lever until it is closed, to gently twist it to the clock.
This isolates the radiator and stops water from flowing through while you work.
Step 3: Release Pressure and Drain (If Needed)
If you change the entire TRV body, empty the radiator, especially on a combi boiler or pressure system.
Here’s how to do it:
- Place a container under the TRV to catch any water.
- Use radiator bleeding to open the air valve on top of the radiator.
- Loosen the Union nuts and gently connect the TRV to the radiator. Be ready for some water to come out.
- Empty the water until it stops draining. If necessary, tilt the radiator slightly against the valve you help it drain.
Tip:
Want to replace the radiator valve without draining the whole system? You can use a freezing kit on the pipe below the TRV. This creates an ice plug that holds back the water. But this is best for short, quick jobs and when you’re confident in your ability.
Step 4: Remove the Old TRV Valve
Once the radiator is drained and isolated:
- Use an adjustable key to loosen the nuts that connect the TRV to the radiator tail.
- Then loosen the compression fittings that connect the TRV to the bottom pipeline.
- Carefully remove the TRV valve body.
If you only change the thermostatic radiator valve head, you do not need to touch the pipeline. Depending on the model, just open or open the head. Some may require an Allen key or a small screw under the hood.
Step 5: Wrap the Threads with PTFE Tape
Before fitting the new valve, clean any old tape or dirt off the pipe threads. Then wrap PTFE tape around the threads of the radiator tail and pipe connections. This helps prevent leaks.
Step 6: Install the New TRV Valve
- Fit the new TRV onto the radiator tail and pipe.
- Tighten the nuts using your adjustable spanner. Hold one nut steady while tightening the other to avoid straining the pipework.
- Make sure the TRV is pointing in the right direction (the sensor head should be accessible and upright).
If you’re changing the TRV radiator valve with a combi, make sure the new valve is suitable for sealed systems.
Step 7: Reopen the Valves and Bleed the Radiator
Once the new valve is installed:
- Open the lockshield valve and the TRV slowly.
- Use the radiator bleed key to bleed the radiator—this lets out trapped air.
- Wait for water to come out steadily, then close the bleed valve.
Step 8: Check the Boiler Pressure (Combi/Pressurised Systems)
If you drained the radiator or lost water:
- Check your boiler pressure gauge.
- For combi or pressurised systems, the pressure should be around 1.0 to 1.5 bar.
- If it’s low, open the filling loop on the boiler to top it up.
- Close the loop when the pressure is correct.
Step 9: Turn the Heating Back On
Turn your boiler back on and check the heating. Feel the radiator to ensure it’s warming up properly and that there are no leaks from the new valve.
Replacing Only the Thermostatic Radiator Valve Head
If you’re wondering how to change a thermostatic radiator valve head, this process is much easier and doesn’t require any draining.
Steps:
- Turn the head to the “off” position.
- Look for a small screw or retaining ring at the bottom.
- Loosen or unscrew it and remove the old head.
- Fit the new head in place and tighten the screw or ring.
Make sure the new head is compatible with your valve body. Universal replacement heads are available for most brands.
How to Change a Radiator Valve on a Pressurised System
For pressurised systems, the process is the same but with added care. Because the system is sealed, water will not flow unless you release pressure.
Steps:
- Isolate the radiator.
- Drain only that section or use a freezing kit.
- Monitor pressure carefully.
- Top up using the boiler filling loop once the job is complete.
If you’re not confident, call a professional to help with pressurised or combi systems.
Common Mistakes to Avoid
- Forgetting to turn off the heating and let it cool.
- Not closing both valves before starting.
- Over-tightening or under-tightening nuts (which can cause leaks).
- Not bleeding the radiator properly afterward.
- Ignoring boiler pressure after refilling.
Final Thoughts
The TRV radiator is not difficult to change the valve. With the right tools and some care, you can complete the work in less than an hour – whether you replace the entire valve or just replace the thermostatic radiator valve head.
Always remember to turn off the heating system, separate the radiator and be ready to spread some water. And if you work with a pressure or combi system, keep track of the kettle and keep it up when needed.
With this step-by-step guide, you now know how to change the TRV radiator valve with a combi, replace a radiator valve without immersion, and replace the radiator valve on a pressure system.
Frequently Asked Questions
Yes, but only when you separate the radiator or use pipe freezing sets. It avoids draining the entire system, but requires care and speed to avoid leaks.
If your radiator does not heat properly, it remains very hot or cool regardless of the setting, or if your head is loose or broken, it’s time to change it. Most heads can be replaced without touching the valve body.
Yes, but you must watch your system pressure. Combi systems are sealed, so draining a radiator drops pressure. You’ll need to top it back up using the filling loop on the boiler after replacing the valve.
Absolutely. If the valve itself still works, but the thermostatic head is damaged, you can only change the valve head. It is fast and does not include drainage.
The radiator wants wind, so it can’t be hot properly. After changing a valve to avoid fixed air and restore a complete heat function, always throw blood to the radiator.